The eight steps
Before you start: three questions
A pool is easier to design once you know what it is for. Answer these first, and every choice after them gets simpler.
How will you use it?
Lounging and entertaining point toward a sun shelf, a spa and a generous deck. Swimming laps points toward a long, straight rectangle. Young children point toward a big shallow area and easy steps. A diving board needs a deep end built for it.
Where will it sit?
Watch where the sun and shade fall through the day, think about the view of the water from inside the house, and how people will walk to it. Your city decides how close a pool can sit to property lines and what fence it needs, so treat those as questions for the site visit rather than guesses.
What can you spend?
Every feature and finish moves the price. It helps to know your number before you fall for a slide, and to see what each choice costs while you make it, which is why the designer shows a price estimate as you design.
1.Pick a starting point
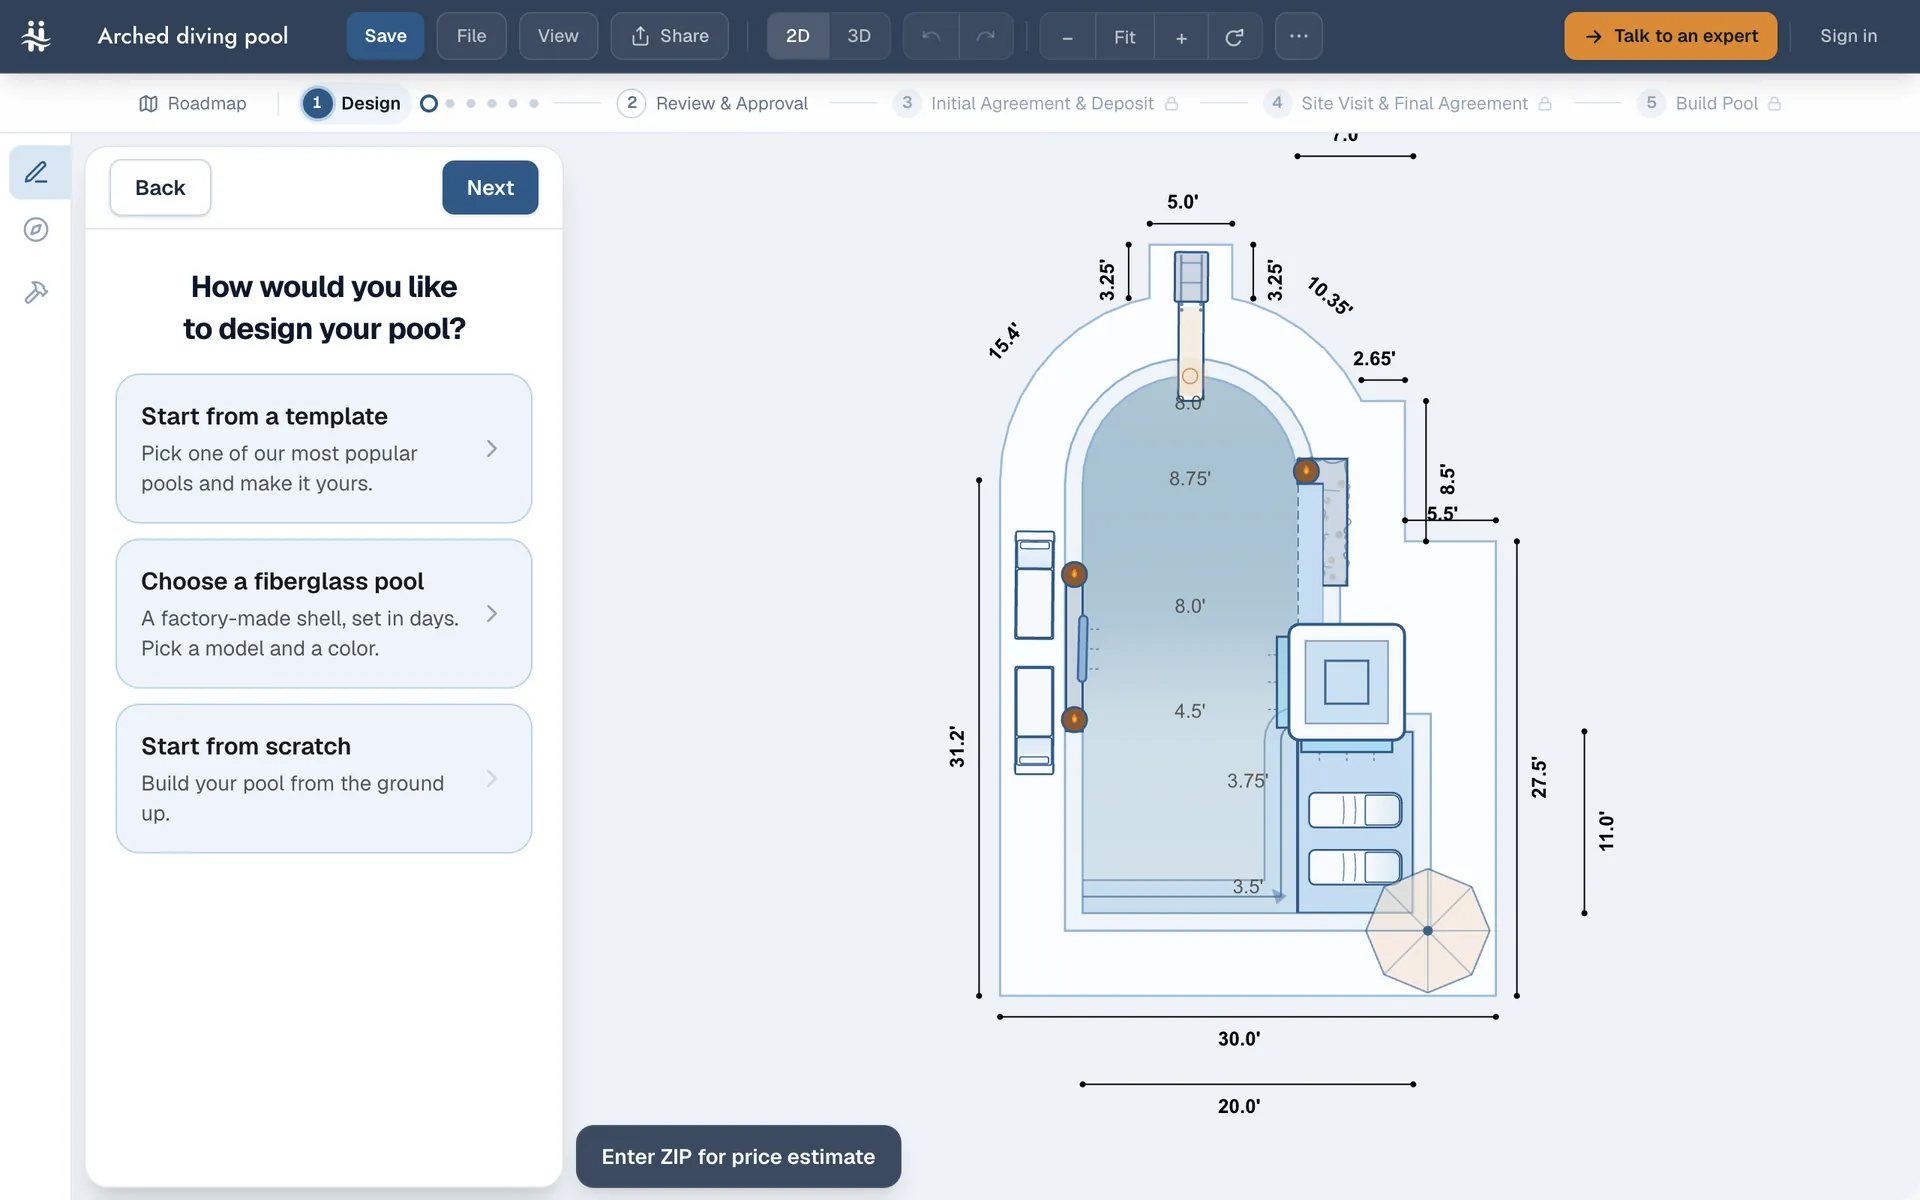
You can start from a template, one of the most popular pools, and make it yours; choose a factory-made fiberglass shell, then pick its model and color; or start from scratch and build the pool from the ground up. A template is the quickest way to a finished-looking pool. Fiberglass shells come in fixed shapes and sizes. Starting from scratch gives you the most control.
2.Choose the shape and size
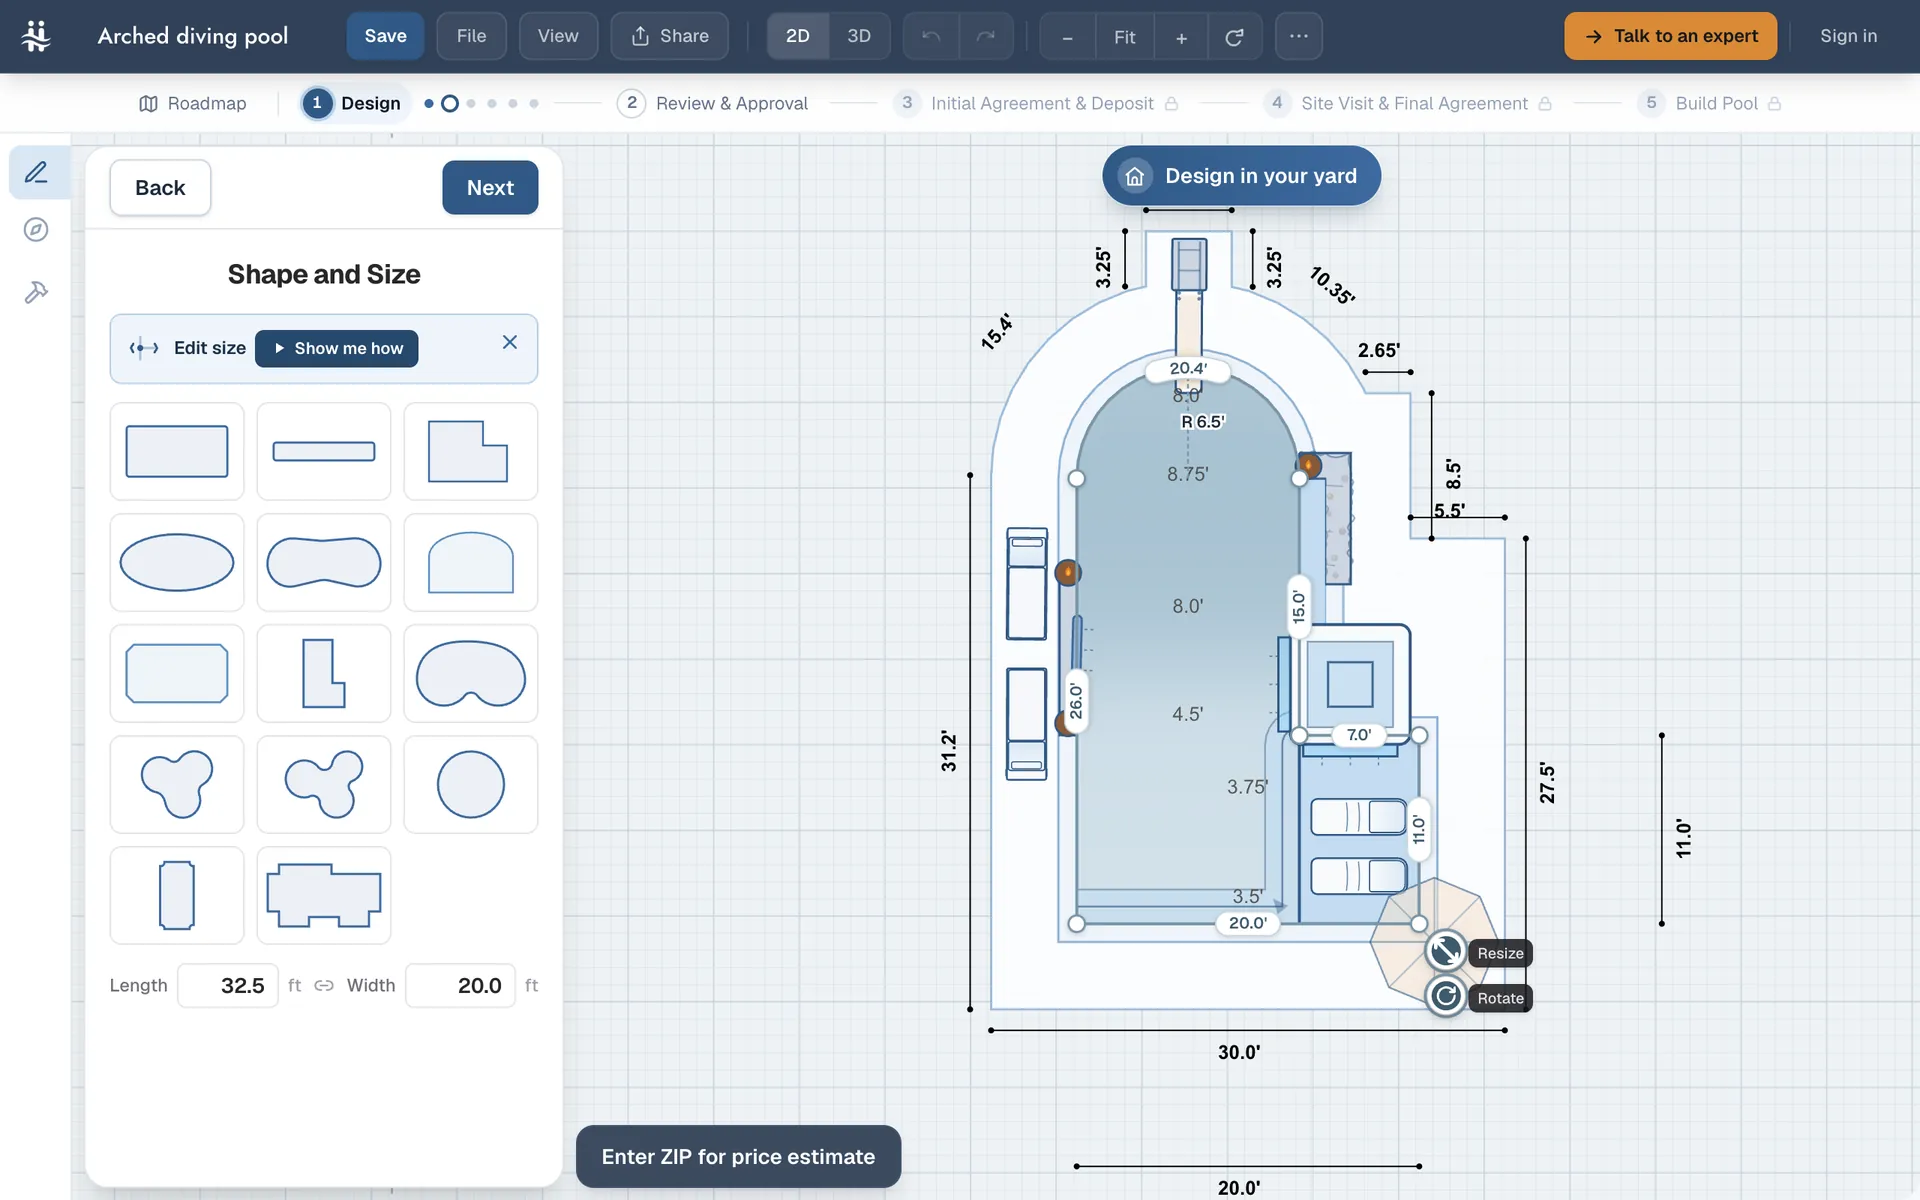
Pick a starting shape: rectangle, lap pool, L-shape, oval, kidney, Roman or Grecian. Then drag any edge to make it your own. Every edge is measured as you go, so you always know how long each wall is.
Rectangles and the Roman and Grecian shapes suit formal and modern yards. Ovals and kidneys suit curving, natural landscaping. For laps, length matters more than width. The designer starts a rectangle at 16 by 32 feet; change it to fit your yard and how you will use the water. Our guide to pool shapes compares all seven, drawn to scale.
3.Lay out the deck
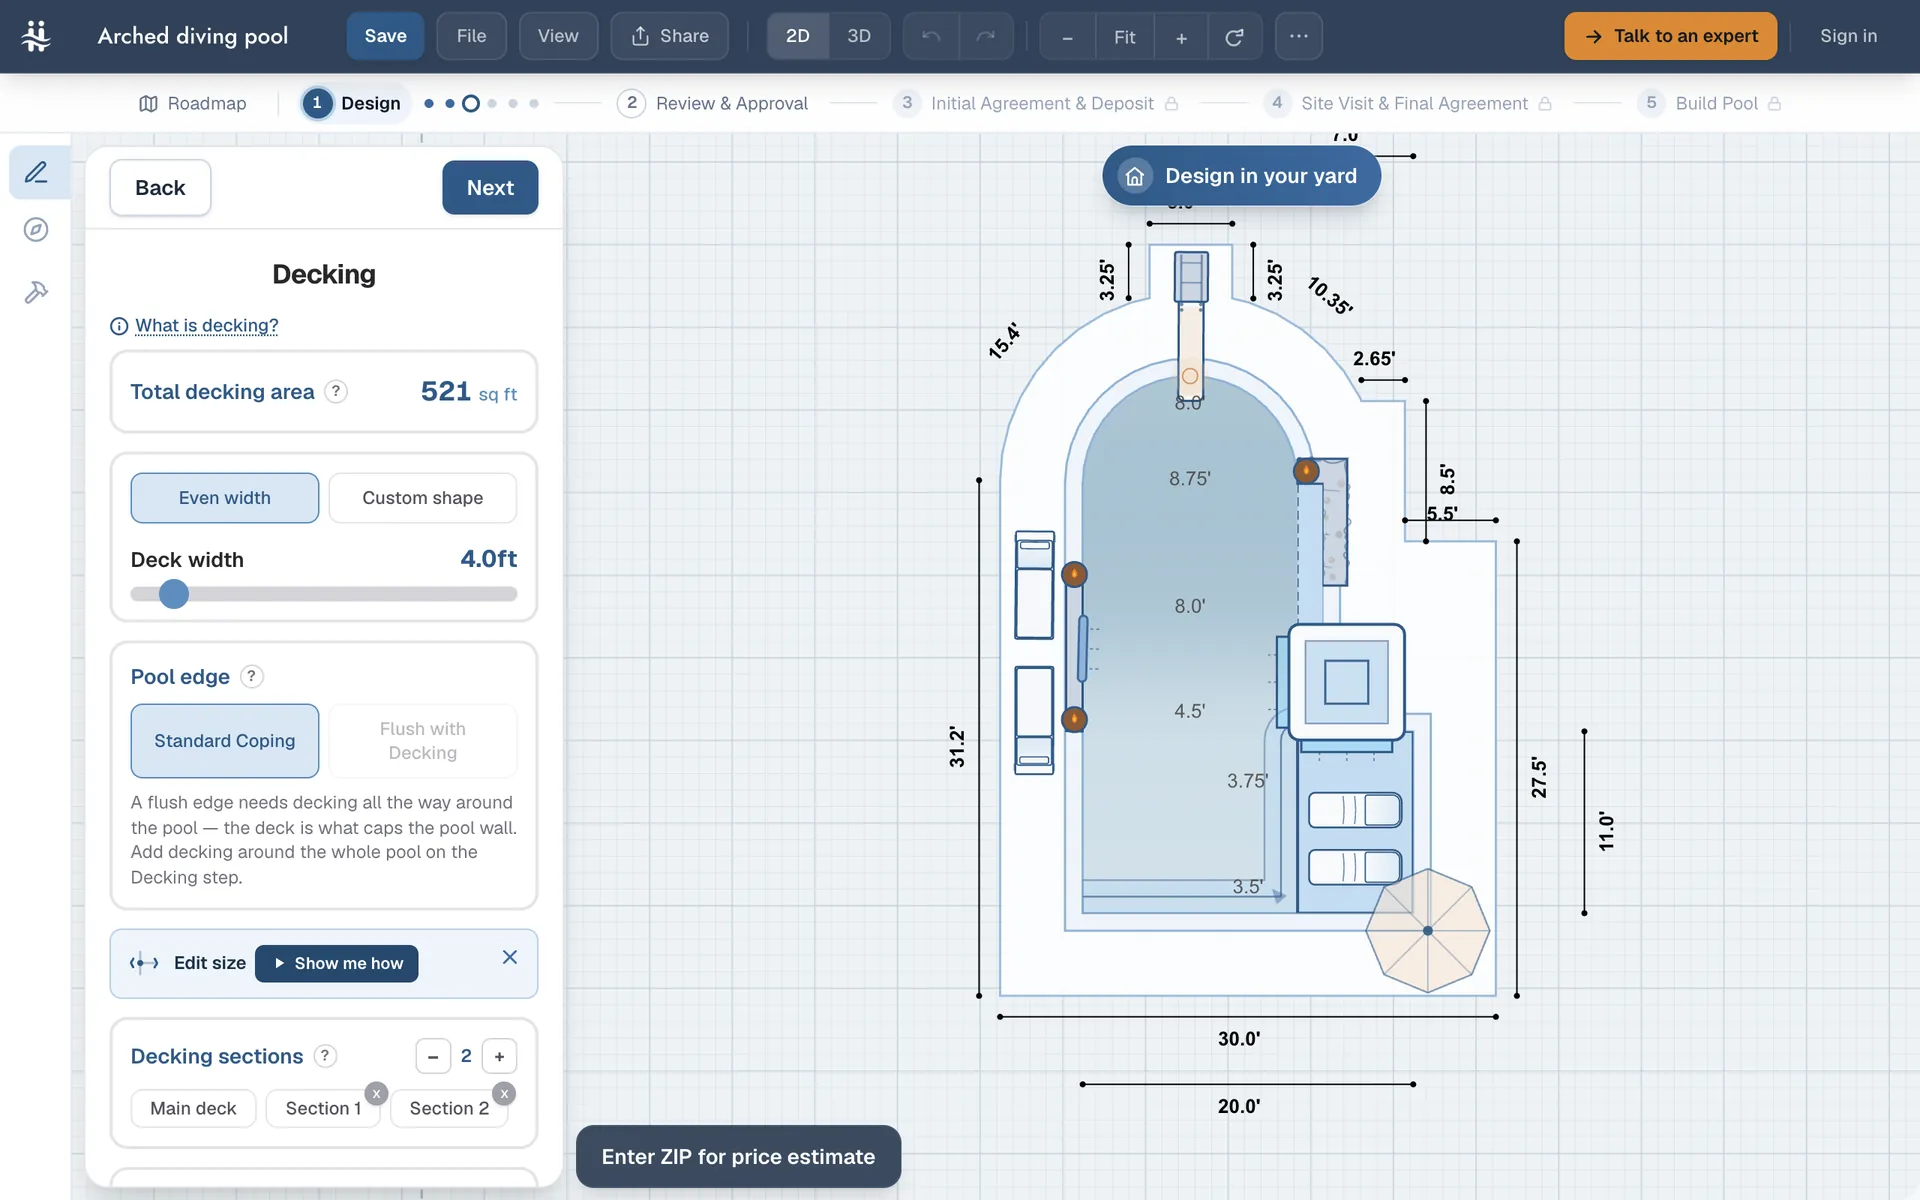
The deck is the paved area around the water. Give it an even width all the way around, or draw a custom shape that widens where you need room. Then choose the edge where deck meets water: standard coping, or a flush edge.
Plan the deck for what will sit on it: loungers, a table, a path from the back door. The deck around the example pool is 521 square feet, and the designer adds up the area for you as you draw.
4.Set the depth
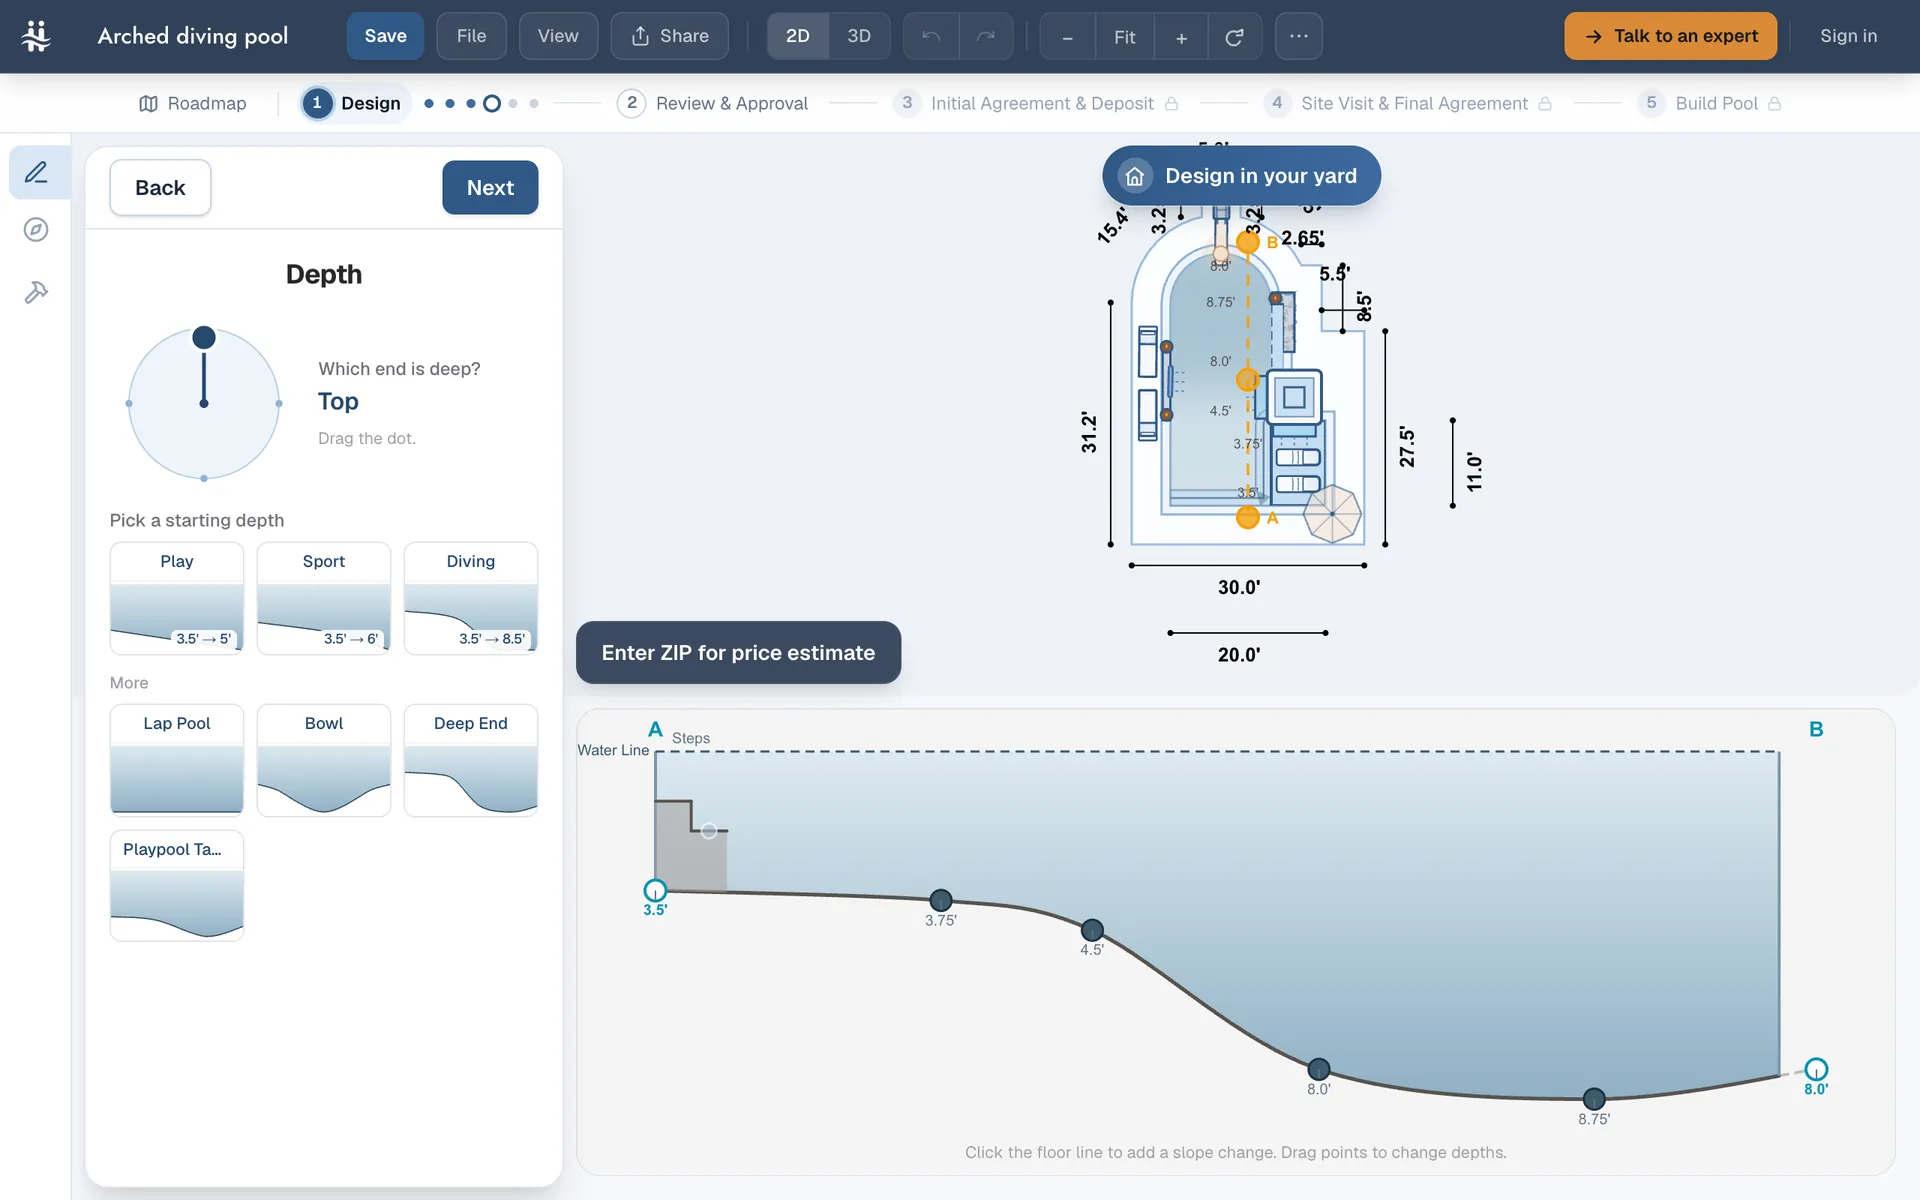
Choose which end is deep, start from a depth profile such as Play, Sport, Diving, Lap Pool or Bowl, then drag the floor line to set exactly how deep the water is from one end to the other. The example runs from 3.5 feet at the steps to 8.75 feet at the deep end.
A lot of pool time happens where people can stand, so make the deep end only as big as you need. If you want a diving board, choose a diving profile and have your builder confirm the depth meets the board maker’s rules and your local code.
5.Add features
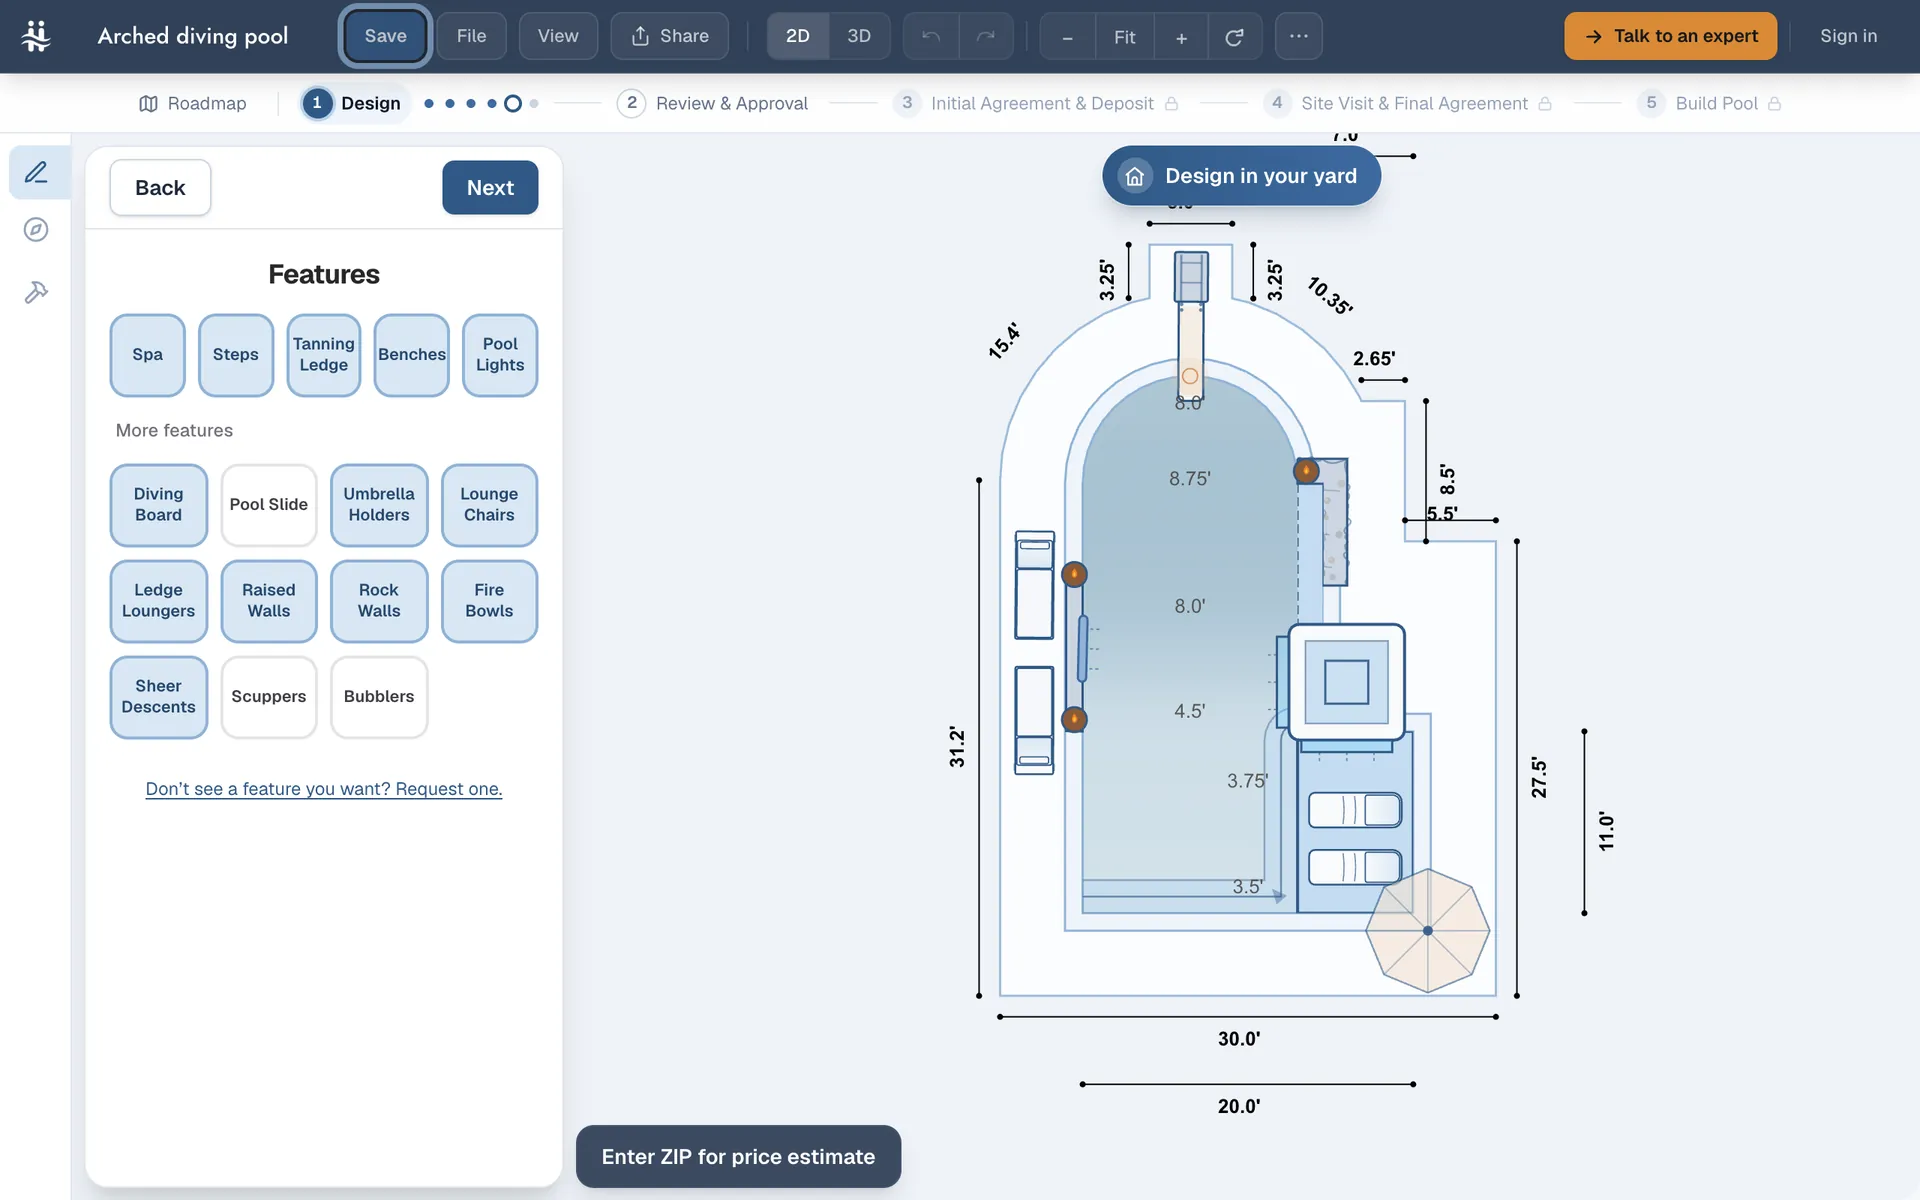
Add the things that make the pool yours: a spa, steps, a tanning ledge (a shallow shelf to sit or lounge on), benches, pool lights, a diving board, a slide, umbrella holders, lounge chairs and ledge loungers, raised walls, rock walls, fire bowls, sheer descents, scuppers and bubblers. Each one snaps into a spot that works.
Add features in order of how much you will use them. A spa you sit in every week earns its place before a slide that gets used for a summer.
6.Choose materials and watch the price
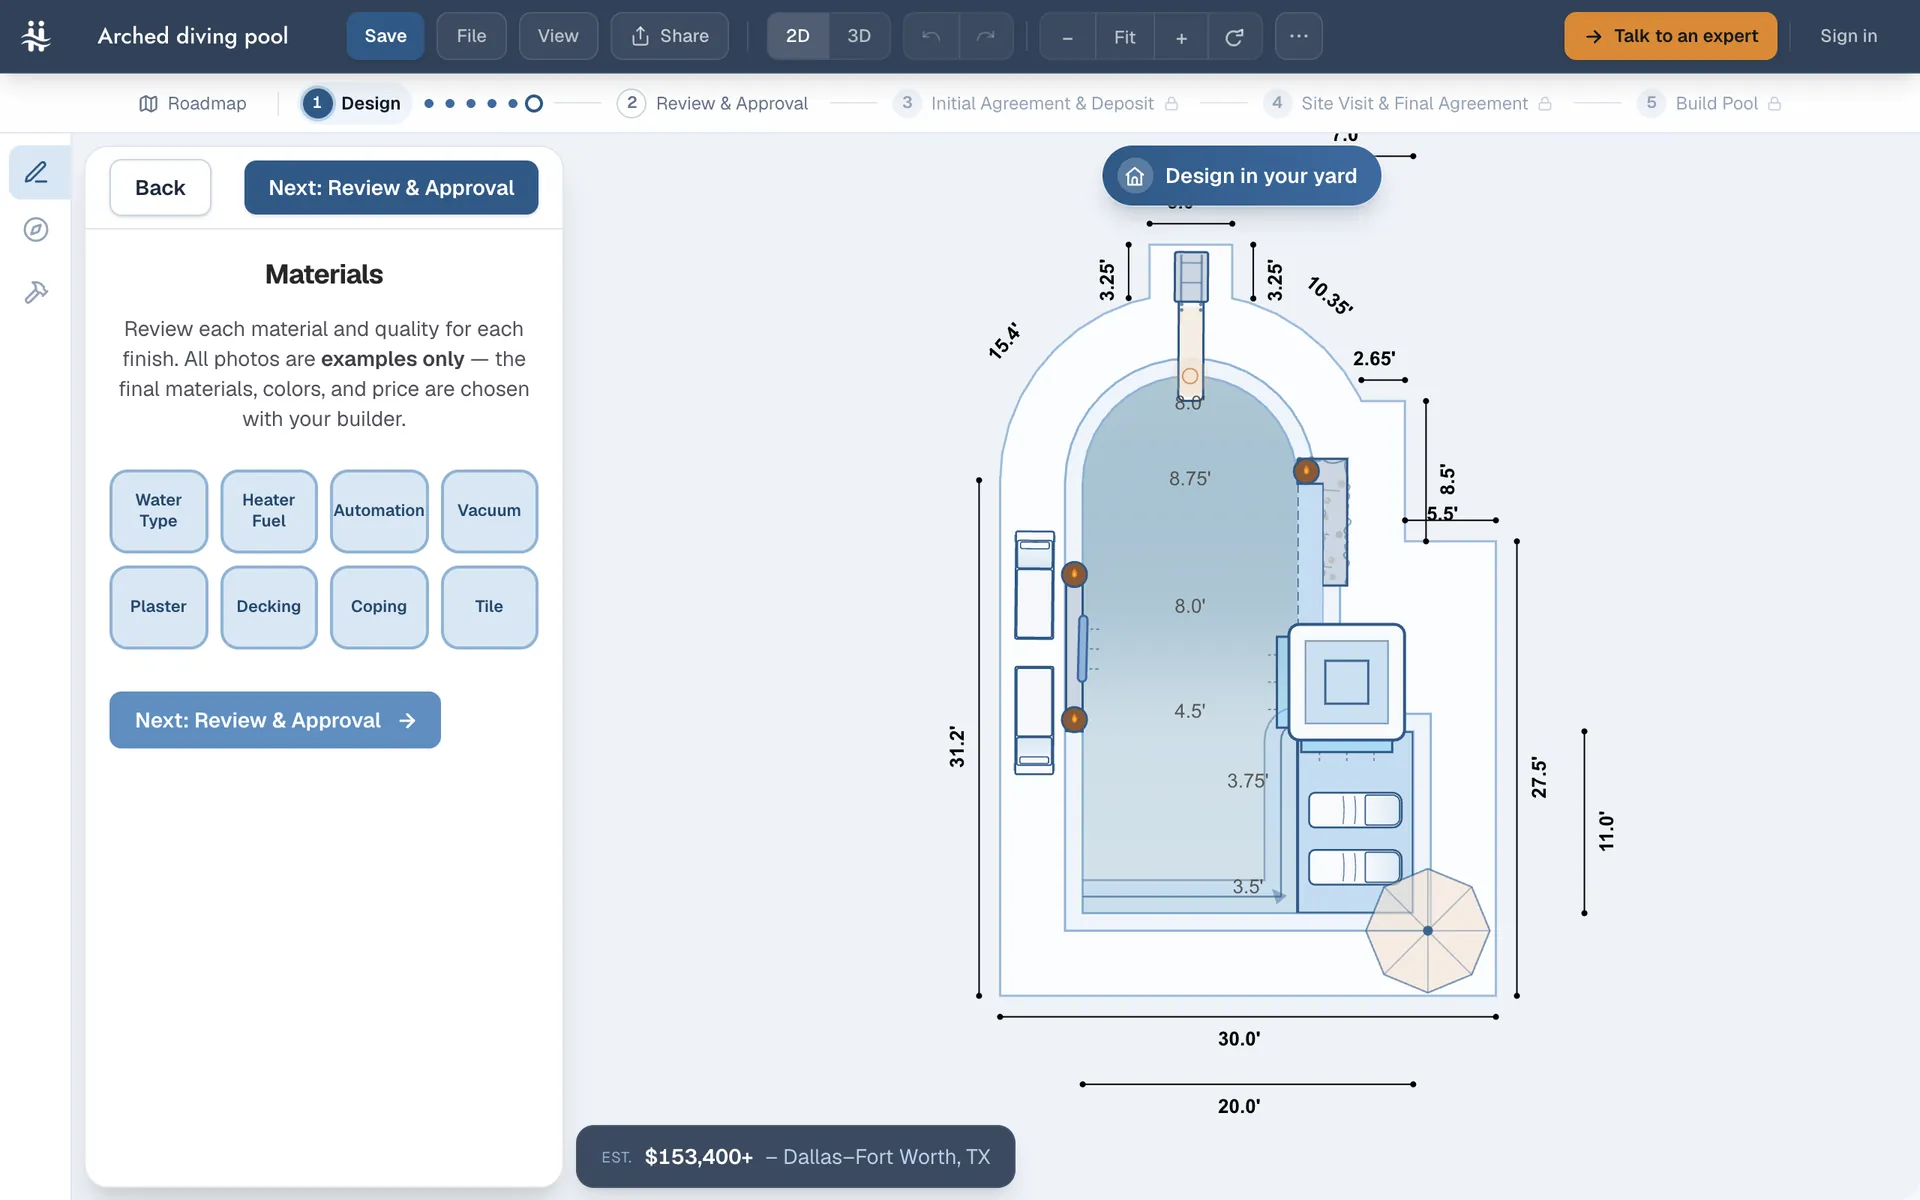
Choose the plaster (the pool’s inside finish, from white plaster to pebble), the decking, the coping and the tile, plus the water type, heater fuel, automation and a pool vacuum. The price estimate updates with every change, so you can see what each choice adds.
The photos are examples. Your final materials, colors and price are settled with your builder, after a site visit.
7.Check it in 3D
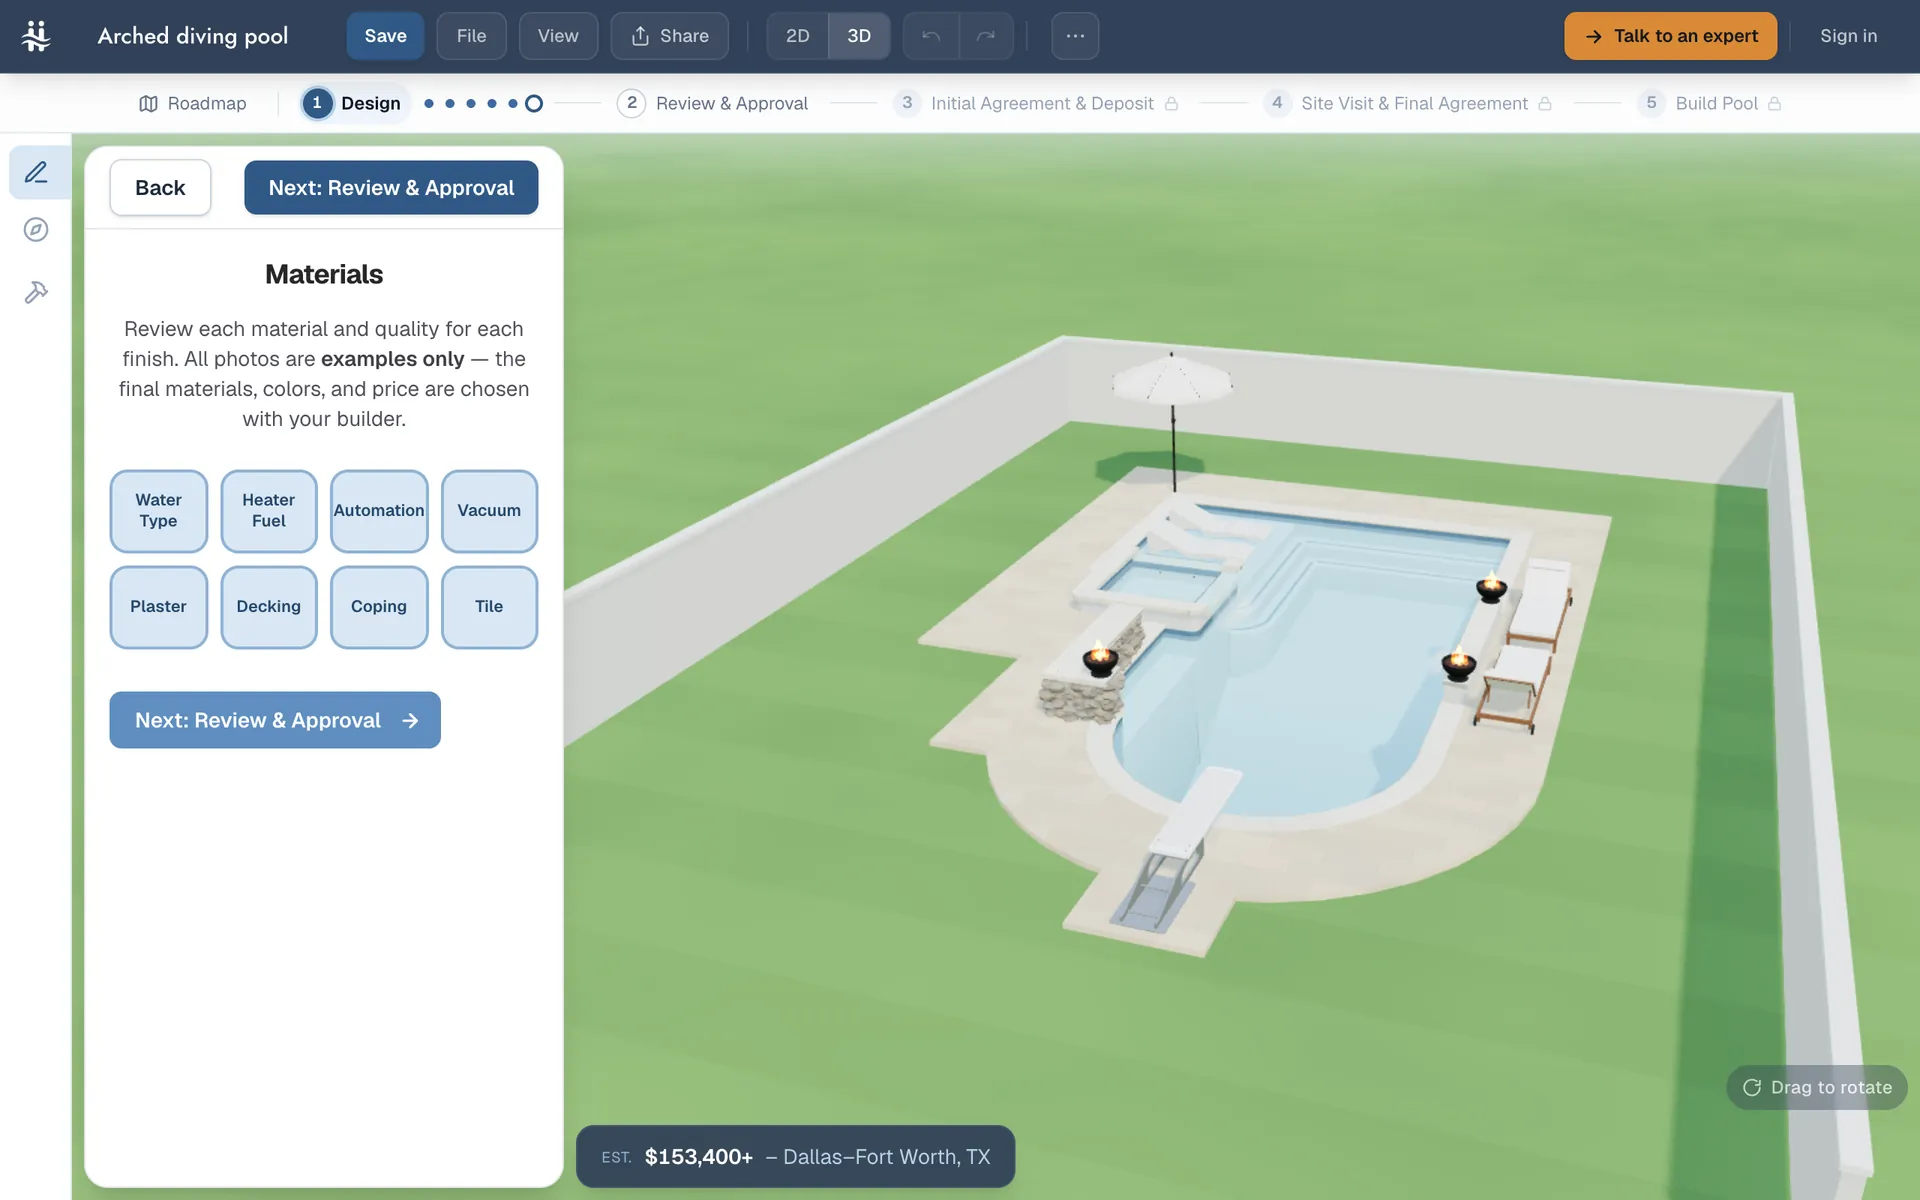
Flip to 3D and turn the pool any way you like. A shape that looks right from above can feel different from the patio, so look at it from where you will actually stand.
8.Review it and see it built
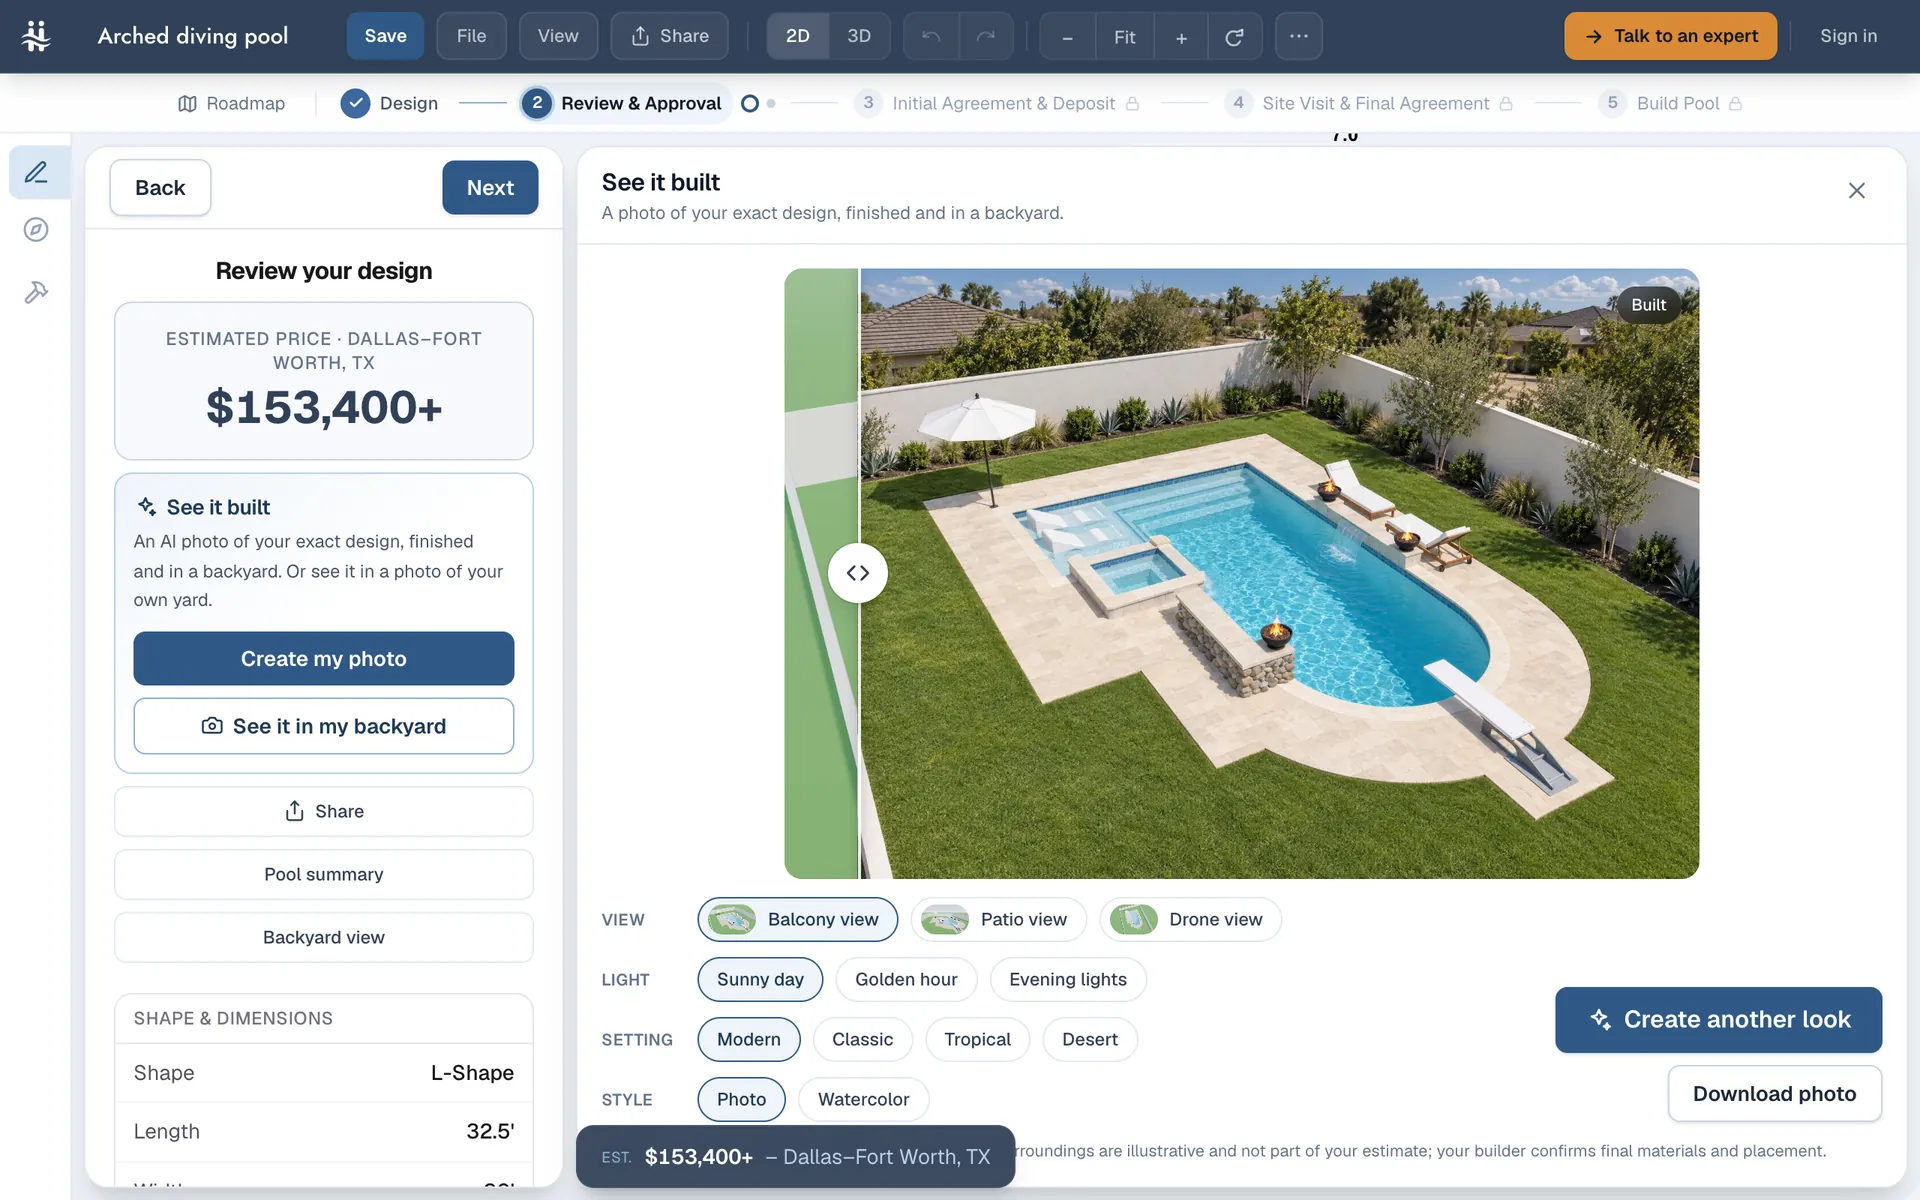
Review puts everything in one place, with your estimate. From there you can send the design to the Fluiidscapes team for a free review, or press See it built: pick a view and the light, and it makes a photo-real picture of the finished pool from your exact design, usually in under a minute.
The picture is a preview, not a promise. Real materials and real yards vary a little, so it shows the look of the pool rather than a guarantee of every detail.
What happens after you design it
Designing is the first of five steps from a design to a pool, and the only one you do on your own. Next, our team reviews the design with you to make sure it is buildable and will look good in your yard. Then you sign an initial agreement and pay its deposit, which books the site visit. At the site visit the team confirms what your yard needs and the final cost, and once you approve the final agreement and pay its deposit, your builder starts.
Mistakes to avoid
- A deck too narrow for furniture. Loungers need room beside the water and a clear path around them.
- Steps in the wrong place. Put the main steps in the shallow end, near where people walk up to the pool. The designer places a rectangle’s first staircase on the shallow-end wall for you.
- Designing only from above. Check the pool in 3D from the patio and from the windows you will see it from.
- Pricing the pool but not what surrounds it. The deck, coping and features are a real part of the price, so add them before you settle on a budget.
- Guessing at local rules. Setbacks, fences and diving depths vary by city. Your builder confirms them at the site visit.
Questions about designing a pool
Can I design a pool myself?
Yes. You can plan the shape, size, depth, features and finishes yourself in a free online pool designer such as Fluiidscapes. A builder then checks that the design fits your yard and your local rules before anything is built.
What size pool should I get?
Start from the space you can give the pool and the deck around it, then size the water for how you will use it. Laps need length more than width, lounging needs a wide deck and a sun shelf, and a diving board needs a deep end built for it. The Fluiidscapes designer starts a rectangle at 16 by 32 feet; drag the edges until it fits.
Should I choose a fiberglass pool or a custom pool?
A fiberglass pool is a shell made in a factory, so it comes in the shapes and sizes its molds allow. A custom concrete pool can be any shape you draw. You can design either in Fluiidscapes, and your builder can tell you which suits your yard and budget.
Do I need a builder to design a pool?
Not to design it. You can design it on your own first, for as long as you like. You need a builder to build it, and a site visit confirms what your yard needs and the final price.
Ready to try it? Open the designer. It is free, and a free account saves your pool.